Text and Figure and Vertical Alignment

|
Main page |
|
Index |
| UK FAQ |
| Documentation |
|
Software
|
|
CTAN Search CTAN: |
|
Statistics |
|
Google c.t.t. Google d.c.t.t. |
|
 |
|
 |

|
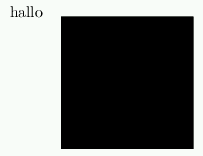
\documentclass{article}
\begin{document}
\begin{tabular}{lp{3.2cm}}
  hallo &
%  \includegraphics{<file>
  \rule{3cm}{3cm}% only demo here
\end{tabular}
\end{document}
|
|
\documentclass{article}
\begin{document}
\begin{tabular}{lp{3.2cm}}
  hallo &
  \vspace{0pt}
%  \includegraphics{<file>
  \rule{3cm}{3cm}% only demo here
\end{tabular}
\end{document}
|

|
\documentclass{article}
\begin{document}
\begin{tabular}{lp{3.2cm}}
  hallo &
  \vspace{-\ht\strutbox}
%  \includegraphics{<file>
  \rule{3cm}{3cm}% only demo here
\end{tabular}
\end{document}
|

|
\documentclass{article}
\begin{document}
\begin{tabular}{lp{3.2cm}}
  \Huge hallo &
  \vspace{-\ht\strutbox}
%  \includegraphics{<file>
  \rule{3cm}{3cm}% only demo here
\end{tabular}
\end{document}
|

|
\documentclass{article}
\begin{document}
\begin{tabular}{lp{3.2cm}}
  \raisebox{-\height}{\Huge hallo} &
  \raisebox{-\height}{%
%  \includegraphics{<file>
  \rule{3cm}{3cm}% only demo here
\end{tabular}
\end{document}
|
| A solution without a tabular environment | |
|---|---|

|
\documentclass{article}
\begin{document}
\begin{minipage}{5cm}
  \Huge hallo
  \begin{minipage}[t]{3cm}
    \vspace{-\ht\strutbox}
    %\includegraphics{<file>
    \rule{3cm}{3cm}% only demo here
  \end{minipage}
\end{minipage}
\end{document}
|